In Part 1, we included a list of potential formats to use when repurposing content. Today, we’ll look at each of these formats in more detail.
By the end of this post, you’ll have a great grasp of what goes into these different formats and how you can utilize them for your own marketing needs.
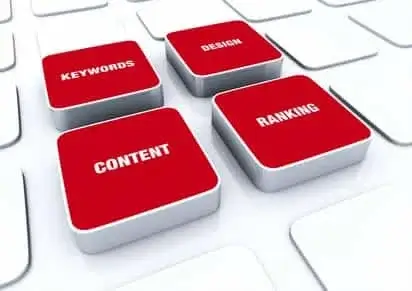
Content Repurposing with Infographics
The infographic is probably the most collaborative piece you will create. With research, writing and artwork, an artist is typically given a detailed framework to start with.
The Guide to Content Repurposing
Part 1: Introduction
Part 2: Infographics & eBooks
Part 3: PowerPoint & Video
Part 4: Promotion
Infographic: Why Repurpose Content
1. Collecting Info
Collecting info for an infographic can be detailed and meticulous work. Many times designers receive the information in several of formats; PDFs, Excel docs, web links, Word docs, etc.
It is usually the designer’s job, with direction, to pull out the key information and statistics to translate to an infographic.
It is important for the person passing along the information to give clear directions to the designer, so the designer can properly illustrate their vision.
The ultimate purpose is to display a great amount of information in a nice summarized graphic.
Learn more in our free e-book
2. Ranking the Content
In most cases, there are statistics that are more important than others. Those statistics need to be translated throughout the graphic.
Showing a hierarchy graphically, as well as in the numbers, adds to the believability in the overall infographic.
For example, if your client wants to show a percentage of profits compared to their competitor, then making their percentages larger and bolder will help make the case. The stats are just the beginning of the graphic. The design elements convey the whole story.
3. Design Approach
The overall look and feel of an infographic can come from the client’s direction – or if you have total creative freedom then it is up to you to find a way that would best appeal to the target audience.
Studies show that different age group reactions can vary when it comes to colors, styles and imagery.
This has to be taken into consideration when determining the design of the graphic; you may not want to use all pastels when your target audience is males in their mid-30’s.
Create HTML Version
There’s a wealth of opportunity to make an engaging, fun, interactive experience for your users.
Tips for a Great Longform Page
1. Whether it’s a post on your blog or a new page on your site, take some time to evaluate your topic and the materials you have.
2. If you have graphics, figure out a way to incorporate them into your piece for added sizzle. Custom backgrounds, icons, and pull-quotes add an appealing visual dimension to your work.
3. Use plenty of typography like dropcaps, formatting, headers and other elements to spruce up long blocks of content.
4. Don’t be afraid to experiment with HTML5 interactive design elements that are SEO-friendly. This can really help your piece get the notice that it deserves.
5. Remember to add links to any other repurposed materials you’ve created to accompany this page, or to return and link to them once they are completed.
Make an eBook
An eBook can be similar to your longform HTML, but perhaps with more in-depth notes or added imagery since the page loading speed won’t be as big of an issue.
A well-done eBook also serves as a lead capturing mechanism, or even a revenue-generating product.
If you create a great book, you can upload it to your site with an optimized landing page and encourage users to give their contact info to download a free copy. This can grow your email list and help nurture your prospective leads along the sales cycle.
Creating an eBook
The process of creating an eBook becomes easier if you have already created an infographic or some other type of illustrations for your content.
You can use the art and illustrations from infographic to then make your eBook. Follow the below steps to get started with your own eBook.
1. Create or Use Current Content
Simply take your document with your content and note any key points your target market may want to read or learn about.
If you are creating new content, follow the guidelines I included within the infographics section of this post.
EBooks are nice because they can really be any length you need or desire.
In-fact it is a great way to compile multiple pieces you have written into one larger piece.
3. Organize Your Content
Organizing your content is an important stage to the overall process. No matter if your end product is a few pages or 100 pages, having your content organized helps with the overall flow and continuity of your piece.
Be sure to divide your content up by sections and use text treatment to make sections stand apart from one another. Remember to include a fair amount of white space within your eBook; this helps readers to not get overwhelmed.
2. Images and Illustrations
After your content is written and organized, you can then fully (some collaboration during the organization part may be need) pass off to your design team.
You can now add images to break up the content, usually at the beginning or end of each section.
Your content should align with the overall theme and content of the piece. Though you can use clipart images,
4. Create a Cover
Every eBook needs a cover. You can take your images that have been already created and incorporate them.
Remember the cover is the first thing your audience will see, so have it fit with the overall theme of the piece.
5. Create a PDF
Once you are finished all the pieces of your eBook, you then need to turn the whole document into the proper format.
Sometimes, you’ll simply use a PDF and call it a day.
But if you are submitting your book to another site, you’ll want to make sure that you are submitting in the form they prefer.
You may need to convert to a specific file format, like ePub, to ensure that your book is accepted and able to be read on the devices you intended. You can find file convertors that make this job simple.
There’s More!
Don’t worry, we aren’t finished yet. In Part 3, we are going to explore how to repurpose content with PowerPoint and videos. We look forward to seeing you then!